Webhook Node
If you need to send your workflow results to another system or app, the Webhook Node is the perfect tool for the job. It acts as a messenger that takes all the important information from your workflow, up to the point where the Webhook Node is added, and delivers it wherever you need it to go - whether that’s a cross-app integration platform like Zapier or Make, your own backend, a third-party service, or any other system that can receive web requests.
What is a Webhook Node?
A Webhook Node is a specialized component that:
- Collects results from your workflow up to that point
- Organizes the data in a consistent, structured format
- Sends this information to your specified URL endpoint
This creates a bridge between your MindPal workflow and other systems, making it easy to integrate with your existing tools and services.
When to use a Webhook Node?
Consider using the Webhook Node when:
- You need to send workflow results to another system
- You want to trigger actions in external applications
- You want to store or process workflow results elsewhere
Here are some common scenarios where Webhook Node excels:
| Scenario | Example |
|---|---|
| Data Collection | Sending customer info collected from a form to your CRM system |
| Integration | Triggering actions in your backend when a workflow completes |
| Automation | Automatically updating external systems with workflow results |
| Distribution | Sending workflow outcomes to a third-party service to publish |
How a Webhook Node Works
The Webhook Node operates through a simple process:
- Collects all workflow data up to the current point
- Structures the data in a consistent JSON format
- Sends a POST request to your specified webhook URL
The webhook will send data in this structured format:
{
  "workflow_run_id": "string", // The ID of the workflow run
  "workflow_id": "string", // The ID of the workflow
  "workflow_title": "string", // The title of the workflow
  "workflow_run_input": [
    {
      "index": number, // The index of the input, starting from 0 and incrementally going up
      "title": "string", // The title of the input
      "type": "string", // The type of the input (e.g., "TEXT", "NUMBER", "DATE", "SELECT", etc.)
      "content": "string" // A stringified version of the input
    } // An array of all the inputs to the workflow up to the Webhook Node
  ],
  "workflow_run_output": [
    {
      "index": number, // The index of the output, starting from 0 and incrementally going up
      "title": "string", // The title of the output
      "type": "string", // The type of the node (e.g., "AGENT", "ORCHESTRATOR_WORKER", "LOOP", "EVALUATOR_OPTIMIZER", etc.)
      "content": "string" // A stringified version of the output
    } // An array of all the outputs from the workflow up to the Webhook Node
  ]
}
Configuring a Webhook Node
One workflow can have multiple Webhook Nodes. To set up a Webhook Node, you need to configure these essential components:
1. Webhook URL Setup
The first and most important step is providing your webhook URL:
- Create a webhook URL in the destination system (e.g. Zapier, Make, your own backend, etc.)
- Enter the full URL where you want to receive the data
2. Testing Your Webhook
Before running your workflow:
- Use the “Send test data” button to verify your endpoint
- Check if your endpoint correctly receives and processes the data
- Verify the data format matches your expectations
Handling Webhook Data
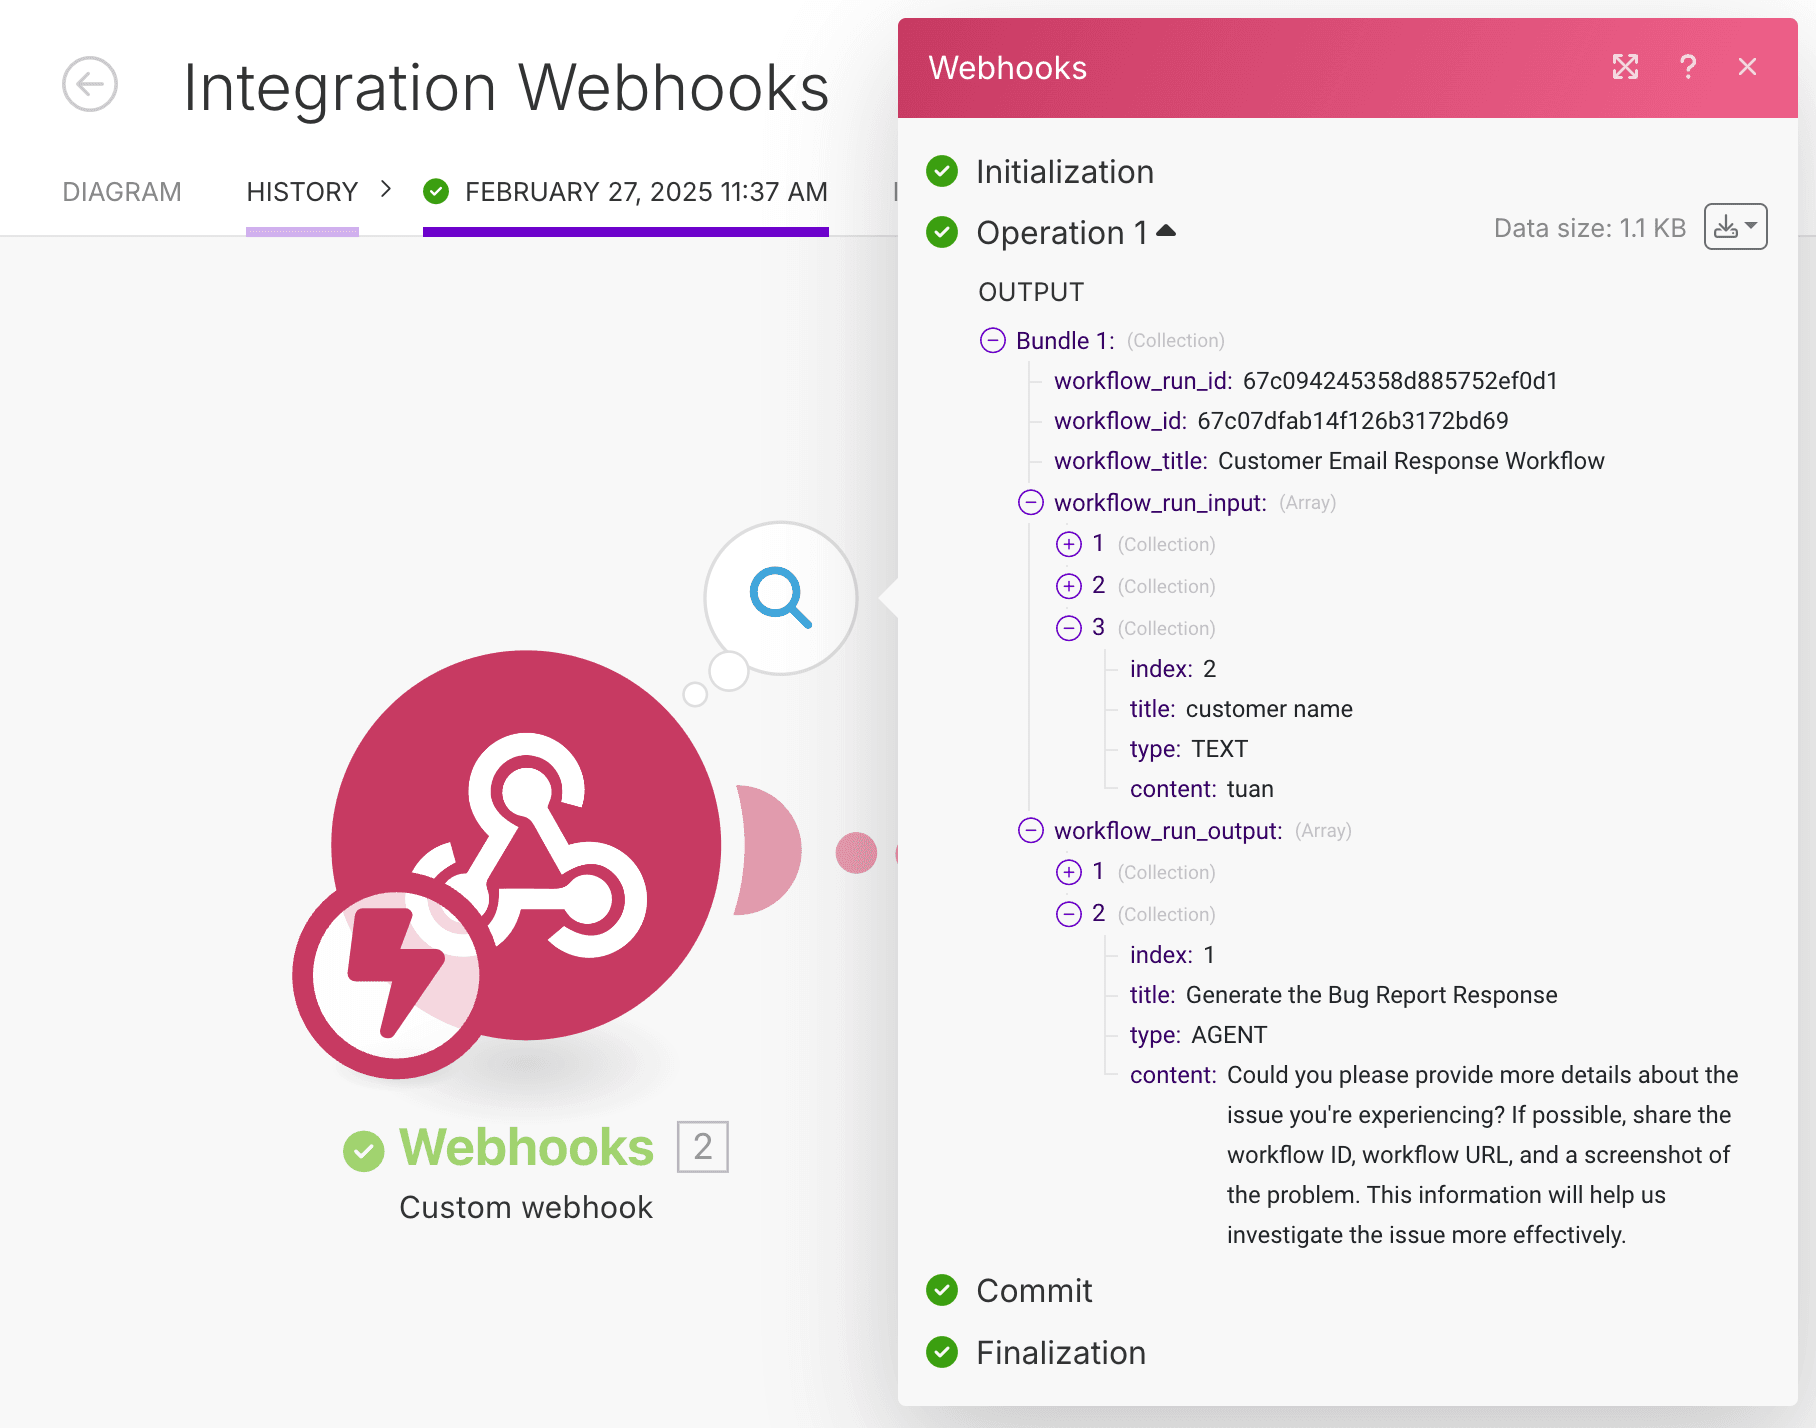
When your webhook sends data to external systems, understanding how to access specific information is essential. Both workflow_run_input and workflow_run_output are structured as arrays, with each item corresponding to a specific step in your workflow.
Working with Make.com
Make.com provides an intuitive interface for accessing webhook data. Here’s how to extract exactly what you need:
To access specific data points:
- In Make.com, click on the webhook module in your scenario
- Click on the data mapping panel to view available fields
- Locate the array (
workflow_run_inputorworkflow_run_output) containing your target data

For example, to access the “content” of the second item in the workflow_run_input array:
- Click on the
workflow_run_inputfield to expand it - Select the “content” field

Now you’ll notice a cursor appears between workflow_run_input and content. Here, you’ll add the item’s position number:

The final result workflow_run_input[2].content gives you the content of the second item in your workflow input array. You can apply the same logic to extract data from workflow_run_output or other properties, such as workflow_run_output[3].title to access the title of the third output item in your workflow.
Make.com uses position numbers starting from 1, unlike the “index” field in the data which starts from 0. To determine which number to use, refer to the webhook data shown in the first screenshot above, where Make.com explicitly denotes the number for each item in the array.
For a step-by-step walkthrough on how to connect your MindPal workflows with Make, check out this video tutorial: